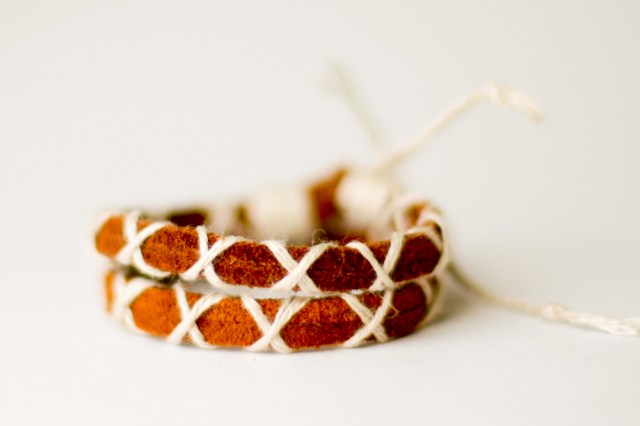
Hidden Kisses - a leather and yarn diy bracelet
I’ve been on a mission to create more fun jewelry that my boys would like to wear. I’ve mentioned this before, but I dig it when boys wear bracelets (and rings!). My daughter loved this bracelet too, so I really think it could be for either girls or boys. I like to think of x’s in the bracelet as kisses, but don’t tell my boys that! I made each of the kids a different bracelet for their Easter present, so I’ll be showing you tutorials for them over the next week or two.
These bracelets are super easy to make. You could make them longer, as well, to wrap around the wearer’s wrist multiple times. It closes easily with yarn through a loop in the bracelet that’s low profile enough that it won’t irritate the wrist.
This bracelet is part of my commitment to make only handmade gifts this year. For more great tutorials and patterns for easy to make handmade gifts, check out my year of handmade gallery here or click the button below:
The complete photo tutorial for the bracelet is below.

Materials:
Leather lace/cord (at least 15")
Yarn (I used a scrap of 100% linen yarn leftover from this gorgeous project)
Cut two lengths of the leather cord, such that there is enough to go around the wearer’s wrist plus a 1/2 an inch. Place the two pieces of leather cord side by side. Fold the two pieces over approximately 1/2 an inch.
It should form a loop like this below. This is the “clasp” of the bracelet and where you will thread the yarn at the end to tie it on to your wrist. You could glue this loop before you add the yarn if you want it uber-secure.
Fold a length of 18" of yarn in half. Take it in the middle and wrap it around the folded end of the leather a couple of times. In the photo below, the piece of yarn pinched in my hand has 9" of length and the other half of it, hanging off the end of the bracelet is approximately 9" in length.
Secure the leather loop with the yarn as pictured below, by making several “locking loops” and bringing each one over the end of the bracelet. Note the tail of the yarn goes underneath the loop. Repeat this multiple times, pulling tightly, until the leather loop is secure.
It should look like this when you’re done.
Now begin the cross pattern, bringing both lengths of yarn to the front and crossing in an X. Then bring both pieces of yarn to the back, creating an X on the back side of the bracelet. Bring to the front and make another X, etc.
Repeat making X’s in the front and the back until you reach your desired length of bracelet. Try to space your Xs such that they look fairly consistent.
When you get to your desired length, stop and flip the bracelet so you are working on the other end. Repeat the “locking loops” to secure the crossing yarn to the end of the bracelet. As at the beginning, twist the loop such that the tail comes out from underneath.
Bring the twisted loop over the end of the bracelet, and tighten.
Repeat this process with both lengths of yarn.
Repeat multiple times and trim the yarn ends.
Knot the ends of the yarn for ease of threading through the leather loop at the other end of the bracelet.
Trim the leather ends, leaving about an 1/8" sticking out past the yarn wraps.
Now, tie the yarn ends through the loop at the beginning of the bracelet.


Leave a comment
This site is protected by hCaptcha and the hCaptcha Privacy Policy and Terms of Service apply.