


Rick Rack Ribbing How To
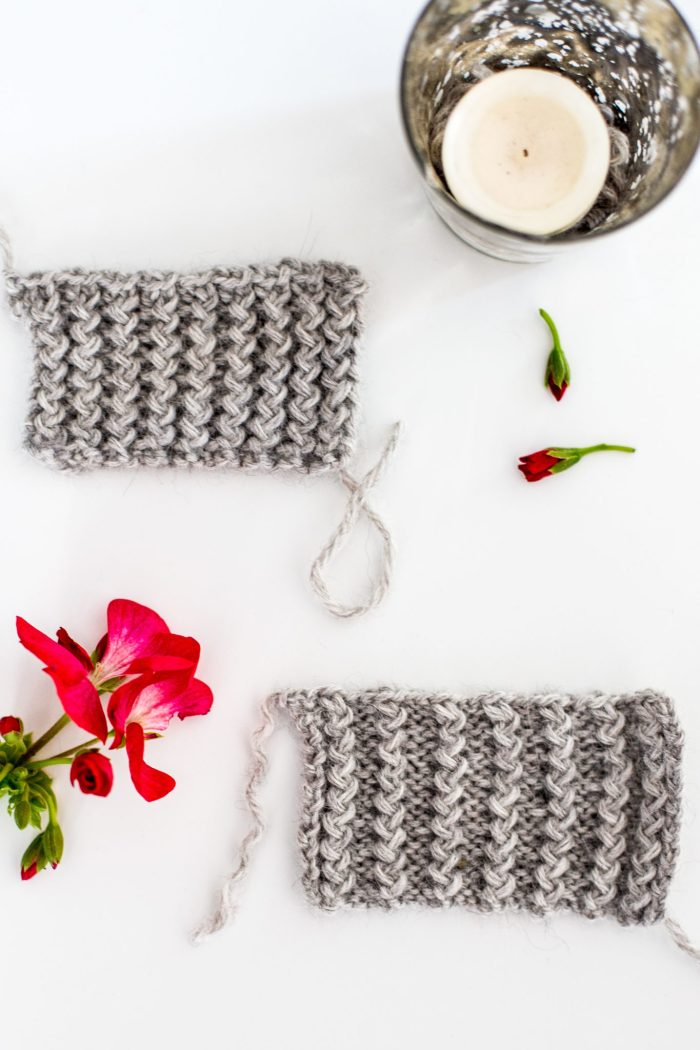
I love these two versions of Rick Rack Ribbing, otherwise known as Zig Zag Ribbing. Not only is it fun to say (c’mon, try saying it 10 times . . . “rick rack ribbing, rick rack ribbing. . . “) Am I right? This stitch pattern is also fun to look at. Rick Rack Ribbing is a great alternative ribbing to spice up regular old K2 x P2 ribbing. This stitch is accomplished with twisted stitches like those used in mock cable ribbing. For the rick rack ribbing, however, you twist your stitches on both sides of the work, giving this cool zig-zag effect. I’m definitely ready to try making a hat in this rib . . . .will be perfect for next winter!
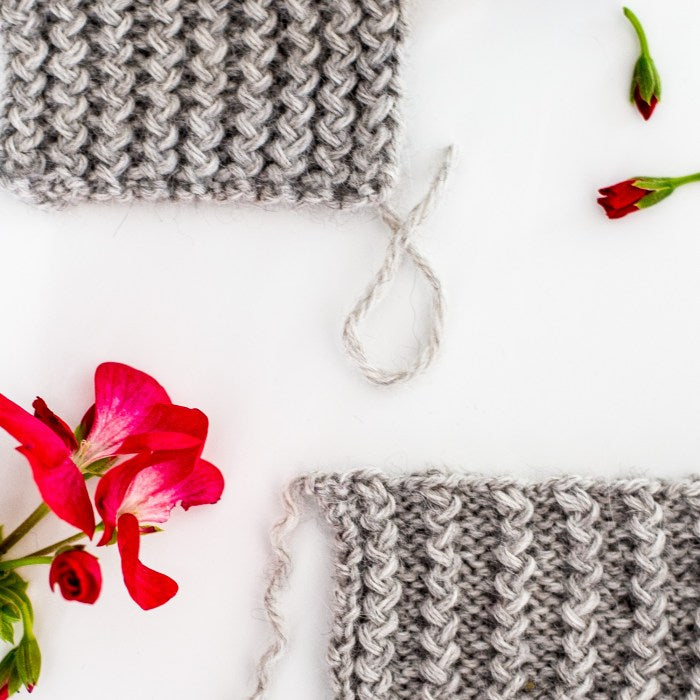
I included two different versions here. The one on the top is the more traditional version, but I like the more spaced out version – it feels like those darling stitches have room to stand out and breath. Of course, I have a pattern for both below. I will write out the pattern and then show you a detailed photographic tutorial so you don’t get hung up on the terminology.

Rick Rack Ribbing
Multiple of 3 stitches + 1 more stitch
Row 1: P1, *K1 through back loop of second stitch, then K1 through first stitch normally and slip both stitches off, P1; repeat from * to end.
Row 2: K1, *with the yarn in front, P1 through the second stitch , then P1 through the first stitch normally and slip both stitches off, K1; repeat from * to end.
Repeat Row 1 and 2 for pattern until desired length.
See photographic tutorial below for details on how to execute above pattern.

To “Knit 1 through back loop of second stitch,” insert your right hand needle through the back loop (tbl) of the second stitch on your left hand needle.

Leaving the first stitch on the left hand needle, knit this second stitch.

See how the second stitch is knit and the first stitch is not, yet they are BOTH still on the left hand needle.

Next, knit the first stitch on your left hand needle as you normally would.

As you finish knitting this stitch, pull both stitches off your left needle. Now, your new twisted stitches are both on your right hand needle. Next, make a regular purl stitch (or stitches if you’re doing the 2×2 rick rack below). Continue this for the rest of the row.

For the purl side, you basically do the same sort of twist. Insert your right hand needle to purl the second stitch on the left hand needle.

Purl that stitch while leaving the first stitch still on the left hand needle.

Then stick your needle into the first stitch and purl that stitch, too.

It will look like this after both stitches are purled before you pull the old stitches off your left hand needle.

Next, pull both of the old stitches off your left hand needle. Next, is a regular knit stitch (or stitches if you’re doing the 2×2 rick rack below). Repeat this process until the end of the row.
Most importantly, remember that you have to twist stitches on both sides of the work to create this pattern .

2×2 Rick Rack Ribbing
Multiple of 4 stitches + 2 stitches selvage
Row 1: P2, *K1 through back loop of second stitch, then K1 through first stitch normally and slip both stitches off, P2; repeat from * to end.
Row 2: K2, *with the yarn in front, P1 through the second stitch , then P1 through the first stitch normally and slip both stitches off, K2; repeat from * to end.
Repeat Row 1 and 2 for pattern until desired length.
In summary, this pattern is the same as the one shown above, only with two stitches space between each rick rack section. The how to do the rick rack portion is the same as the tutorial shown above.
Anne Weil of Flax & Twine created this post on behalf of MarthaStewart.com as a Contributor on September 30, 2015. Have fun exploring my profile and work there.

Leave a comment
This site is protected by hCaptcha and the hCaptcha Privacy Policy and Terms of Service apply.