


Heart Notebooks + Japanese Book Binding Tutorial
I’m so excited to bring another Japanese Book Binding Tutorial for you! This one with a Valentine’s Day twist. This book binding is called the Noble binding, and is a little bit easier than the Hemp Binding, which I showed you last year. I adore these handmade notebooks. My daughter is a note writer. She loves receiving little love notes. These books are a perfect place to collect sweet nothing notes and drawings. Sometimes leaving a note at the top of the stairs is the only way I can get her out of bed in the morning! I’m pretty sure these books will help do the trick!
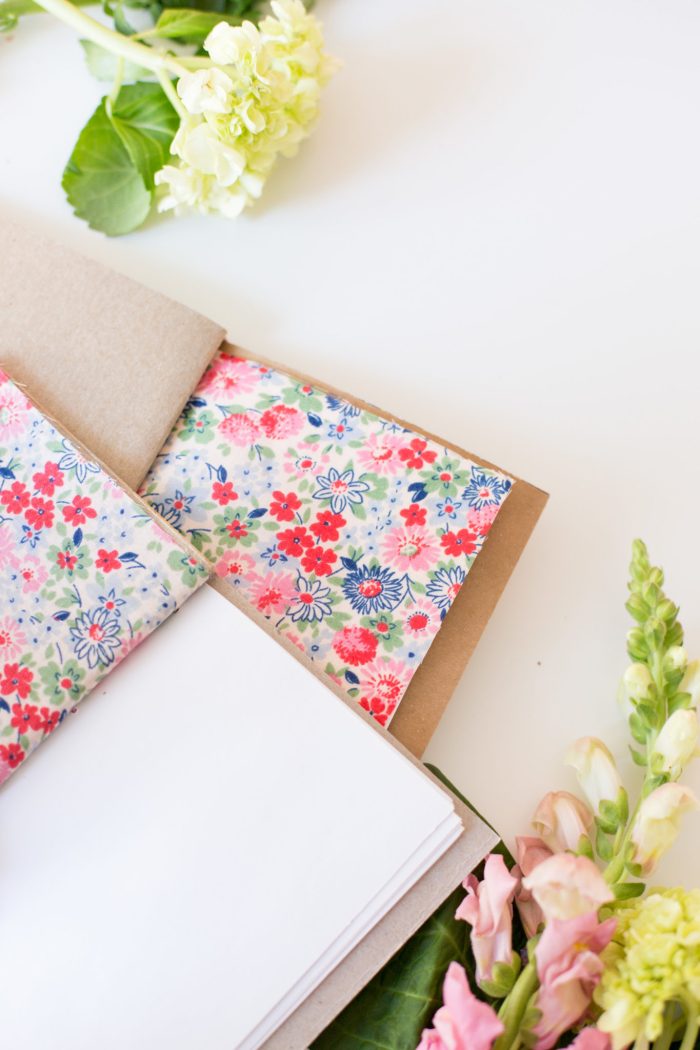
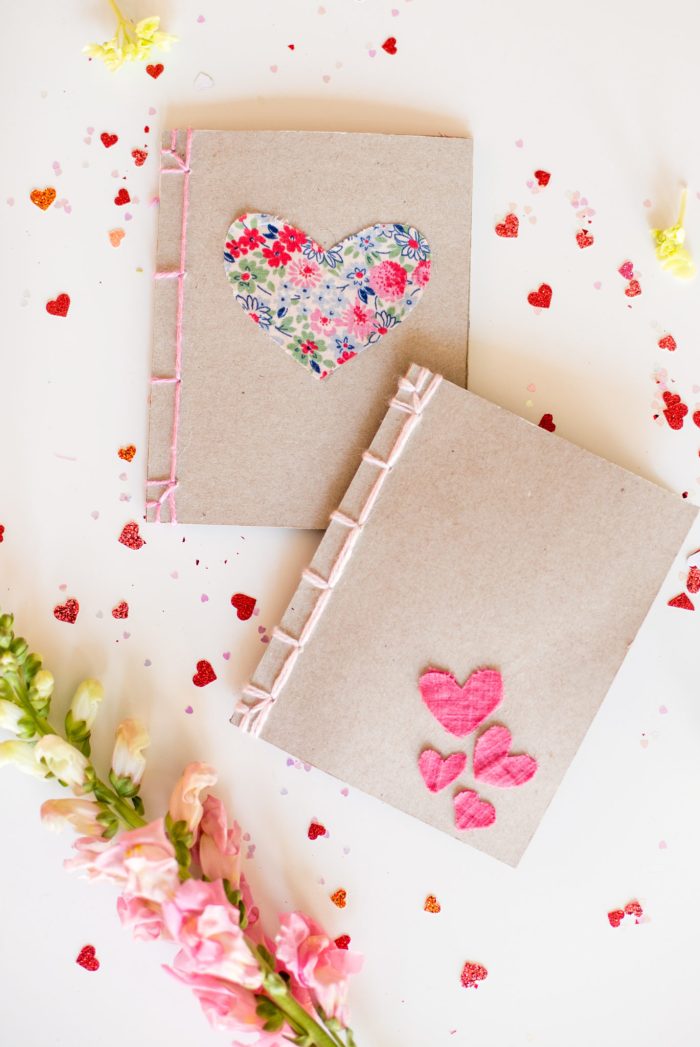
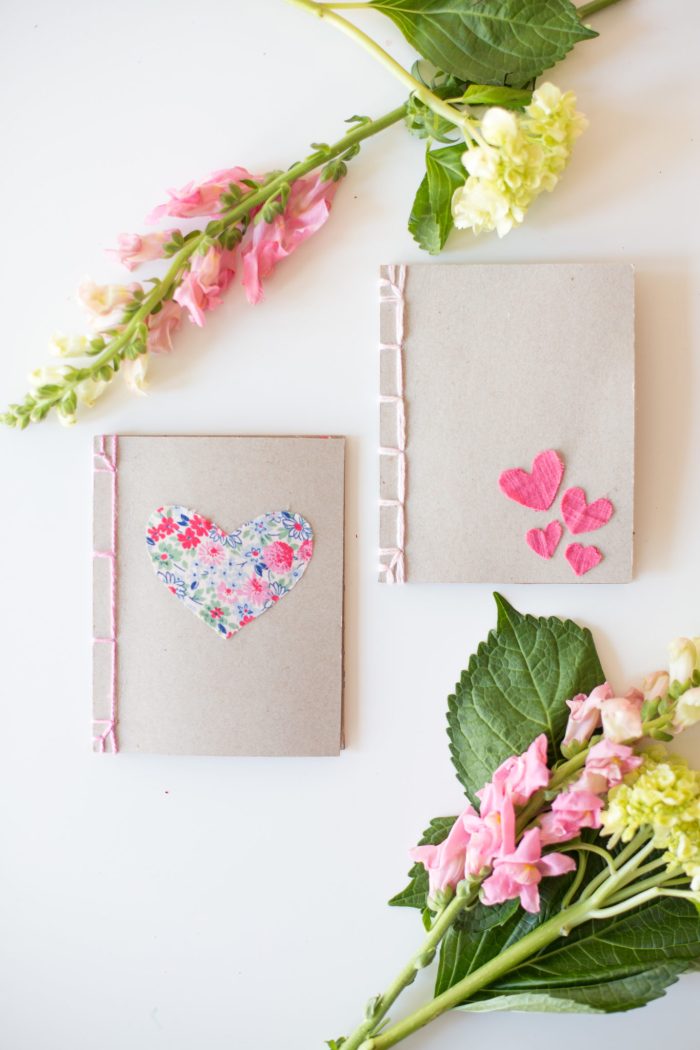
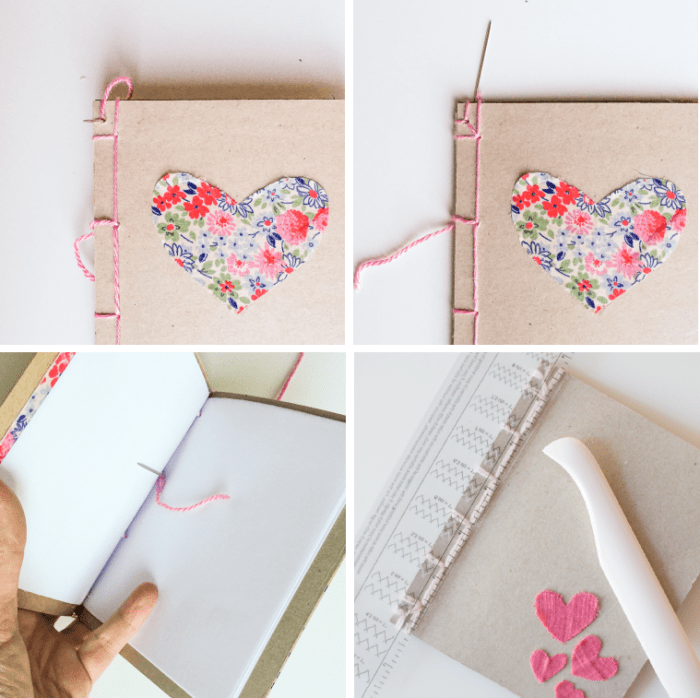
Line the front of the book with coordinating floral fabric to add a surprising but lovely feature to your book.
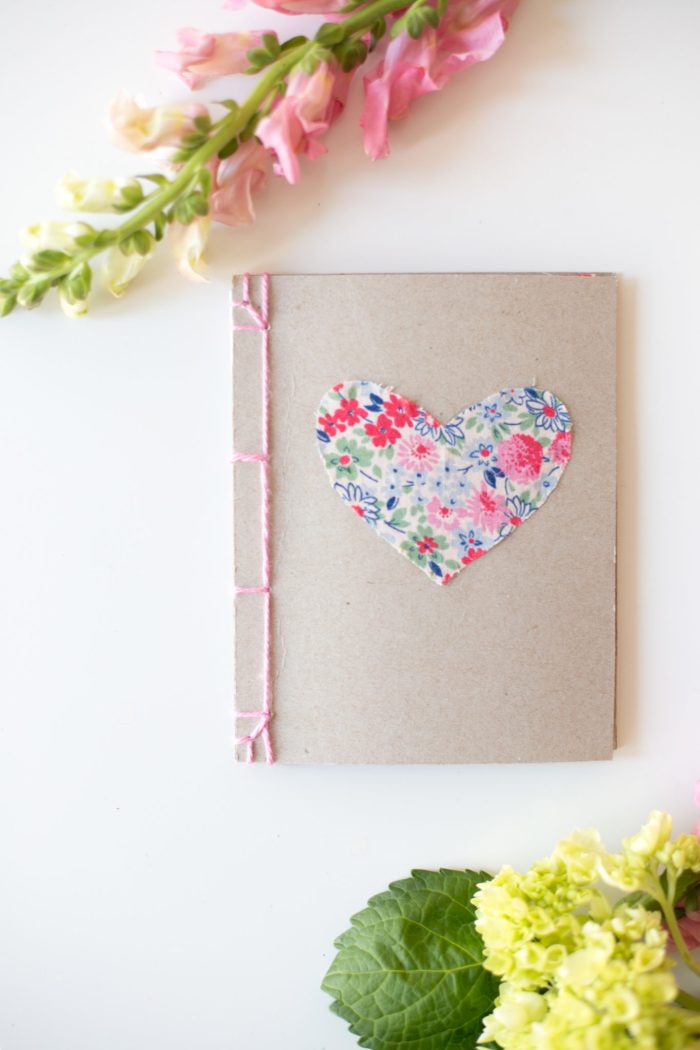
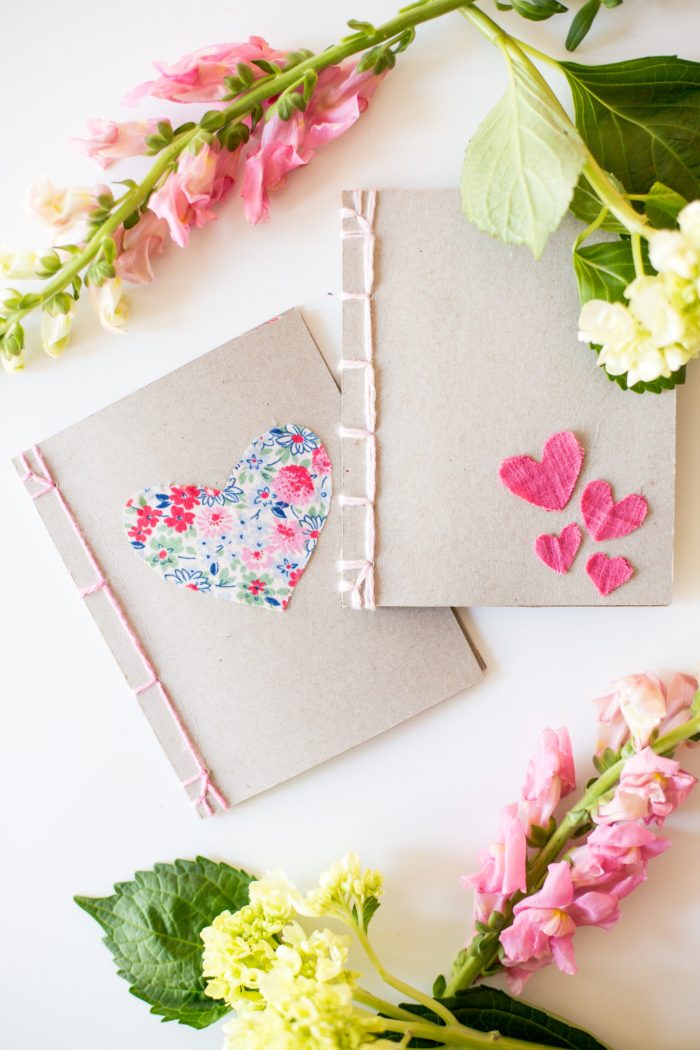
The big floral heart on the front is so fun. Alternatively, you could cut a shape into the cover to show the floral fabric underneath.
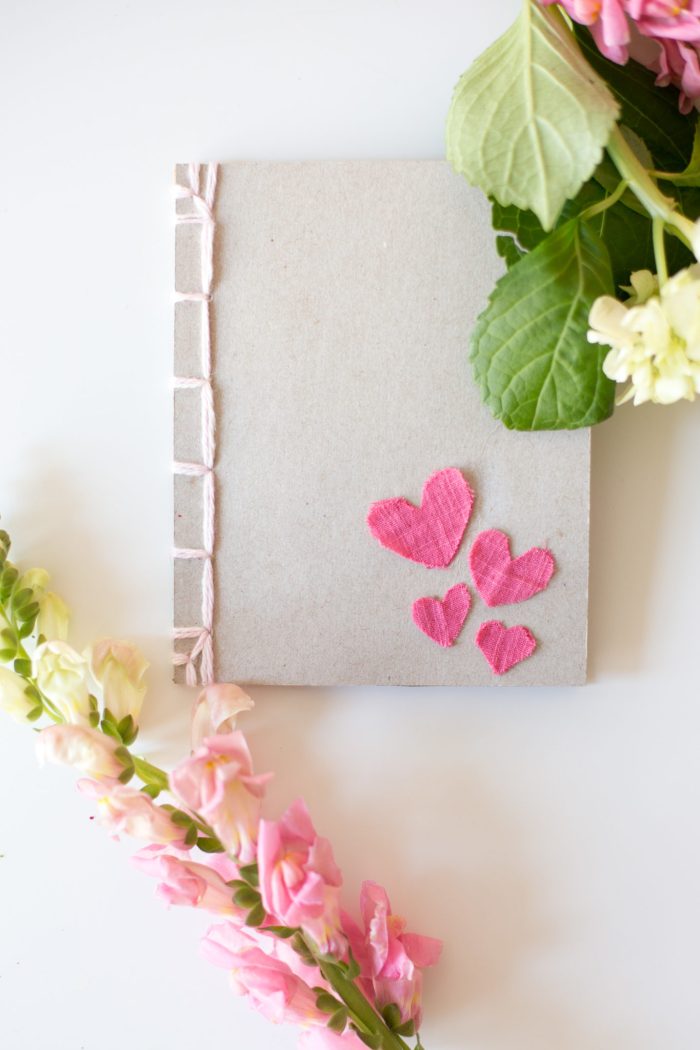
On the little heart version, I added a couple of extra holes for more yarn across the binding and doubled the binding strand for more heft. I like the fuzzy yarn against the paperboard.
 Japanese book binding changes in nature as you alter the materials, from the paper to the covers to the binding thread. So many endless and beautiful ideas for gifts!
For Valentine’s Day, have your kids fill this book with gift coupons (for example: take out the garbage, take the dog for a walk, empty the dishwasher, or BIG bear hug) and give it to Mom or Dad. Or, just fill the book with BIG heart-ful ideas and inspiration!
Japanese Book Binding Tutorial
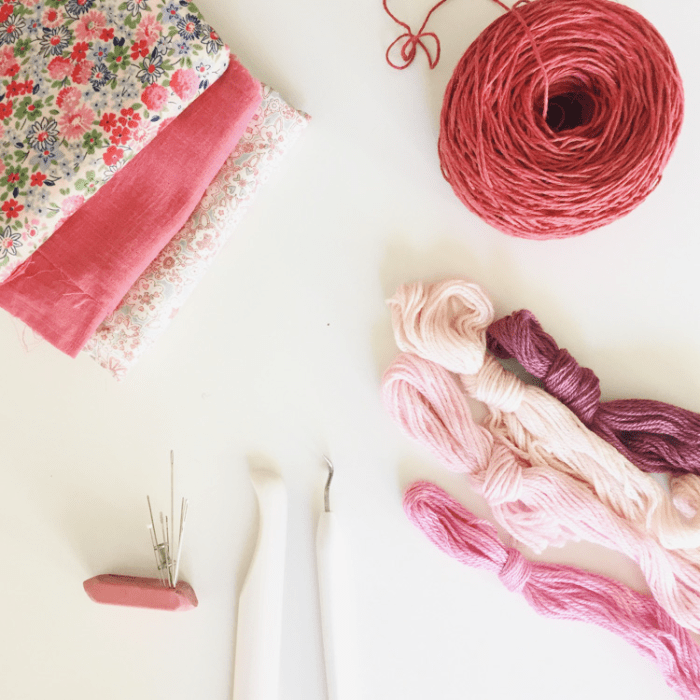
Materials
Paperboard (upcycled cereal or cracker box)
Pencil
Needle
DMC Embroidery Thread
Scissors (like mine)
Fabric (kokka floral, pink double gauze)
Fabric Glue
White paper (white cotton rag paper would be especially nice)
Awl (I used a crafts weeder I had on hand which worked fine)
MS Bone Folder
Ruler

:: Individually fold three to four 8 1/2 x 11 pieces of paper in quarters and cut the folded edge along the top.
:: Cut 2 4.5" x 5.75" book covers out of paperboard. If covers are from a cereal box or printed paperboard, cut 2 more pieces of paperboard or decorative paper at the exact same size and glue to the back side of each cover.
:: Cut decorations out of fabric and glue to front of cover.
:: Let embellishments dry. You can also try embroidering into the paper covers.
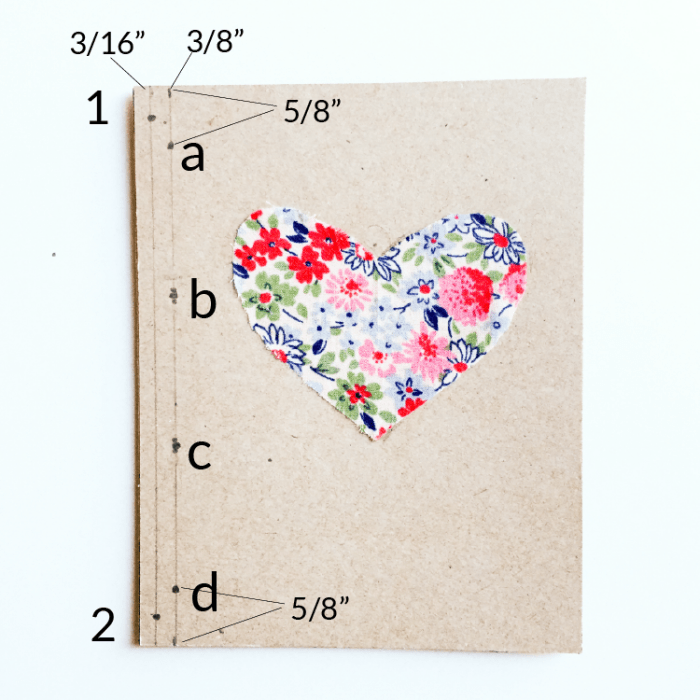
:: On the cover, mark two lines, one 3/16" from the edge and one 3/8" from the edge. Mark four hole spots (A, B, C, D) with a pencil along the 3/8" line. The two outer spots (A, D) should begin 5/8" from the top and bottom of the book. Evenly space the other two hole marks (B, C) in between the first two marks. Mark two dots (1, 2) on the 3/16" line in between the edge of the book and the outer most dots (A, D) on the 3/8" line.
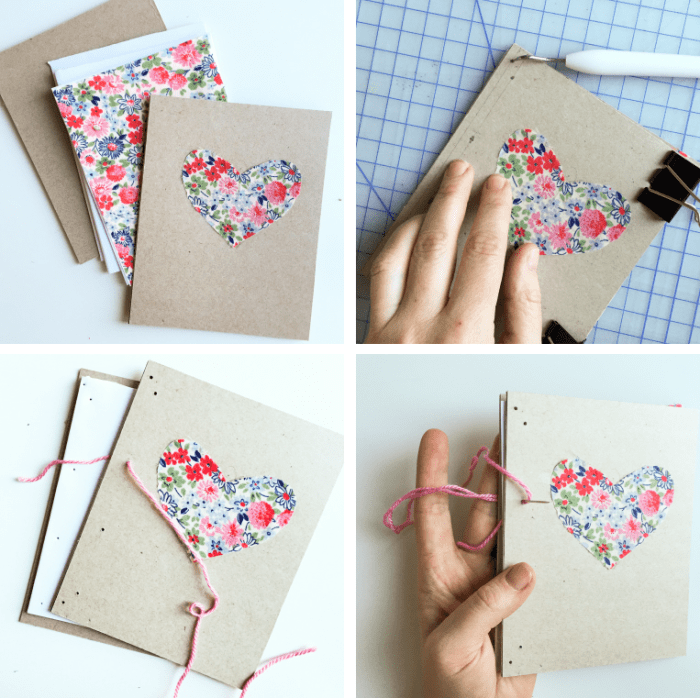
:: Cut additional fabric lining (4.25 x 5.5) for top of paper stack. Carefully stack the book contents together (front cover, fabric front page, bundles of inside pages and back cover).
:: Make sure the edges of the book contents are flush with the binding, and secure with two binder clips on the outer edge. Using an awl, poke holes through all layers in spots as indicated.
:: Separate stack in half and bring needle and thread through the center of the book and through hole B (see labeled guide above). Leave a two-inch tail (it will be tied off at the center of the book at the end).
:: Bring your needle and thread around the outside of the book and back through B from back to front.
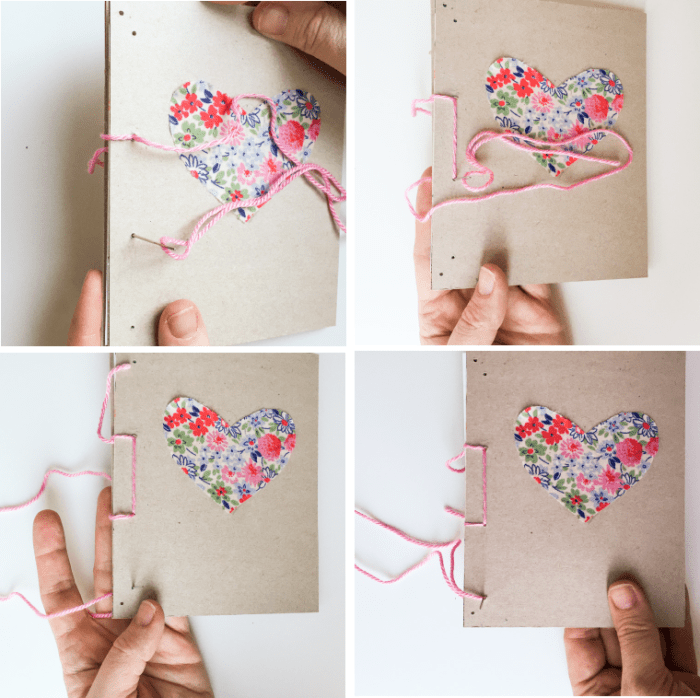
:: Bring thread from front to back through C.
:: Bring needle and thread around the outside of the book and through C again from front to back.
:: Go through D from back to front.
:: Go around the side of the book, bringing needle through D again from back to front.
:: Go around the bottom of the book, bringing needle through D again from back to front.
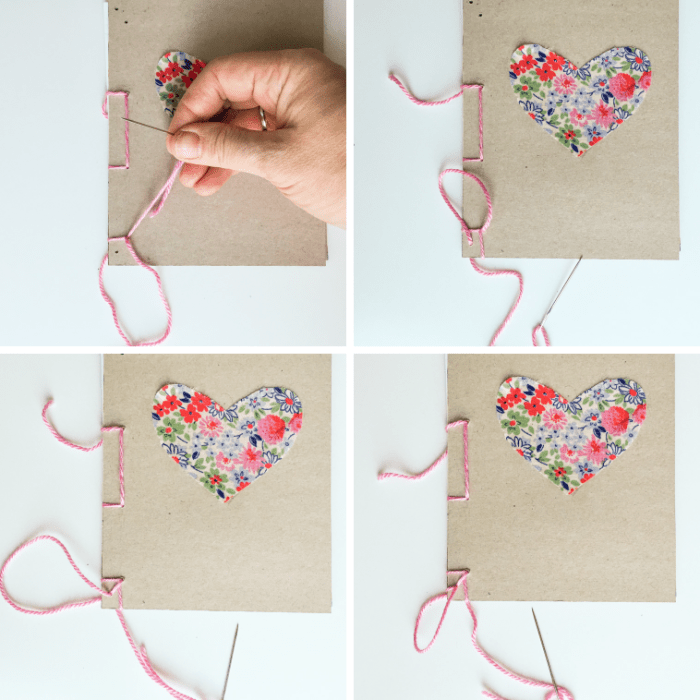
:: Now, go through 2 from front to back.
:: Go around side of book and through 2 from front to back.
:: Go around bottom of book and through 2 from front to back.
:: Come up through D from back to front.
:: Go through C from front to back.
:: Come up through B from front to back.
:: Go down through A from front to back.

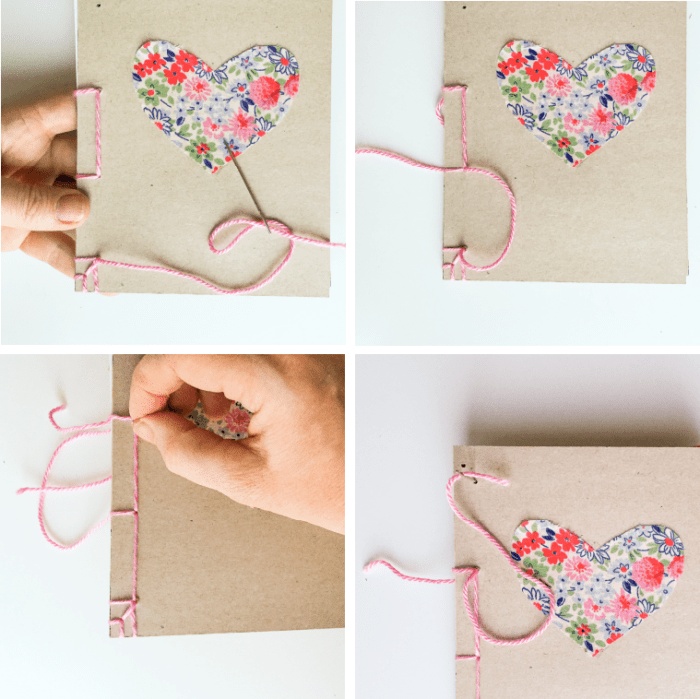
:: Go around the side of the book, bringing needle through a again from front to back.
:: Go around the top of the book, bringing the needle through a again from front to back.
:: Bring needle up through 1 from back to front.
::Go around the side of the book, bringing needle back up through 1.
:: Go around the top of the book, bringing needle through 1 from back to front.
:: Bring needle down through A from front to back.
:: Bring needle up through B from the back and exiting through the middle of the book where you started. Tie a knot tightly in the center of the book and tuck ends into the binding.
:: Use a ruler and a bone folder to score along the front of the cover and the back of the cover just to the inside of the binding to create a foldable edge for the covers to move more freely.
I find the whole process of Japanese book binding much easier than it looks. Definitely give it a whirl and spread some of that love around!
This post was created for MarthaStewart.com by Anne Weil of Flax & Twine as a Contributor. It was published there on February 3, 2016. Have fun exploring my profile and work there.

Leave a comment
This site is protected by reCAPTCHA and the Google Privacy Policy and Terms of Service apply.