Skip to content

Cart

Your cart is empty

Sign up for our newsletter

GET 10% OFF FOR SIGNING UP! Receive updates on new kits, sales, freebies, helpful info + more.

Blog

DIY

Easy Marbling Tutorial + Martha Stewart Living Giveaway

Ryan Liebe for Martha Stewart Living

It’s that time of the month! I’m so excited to be able to share this gorgeous marbling tutorial from Martha Stewart Living. Marbling is one of those crafts that seems really intimidating, but with these instructions, you’ll find it quite simple. There are so many fab applications for this technique, it’s worth giving it a whirl! How much fun would it be to have these coasters for a spring party!
Ryan Liebe for Martha Stewart Living

Okay, I’d take this beauty in my office! love. The other good news is that I have a great giveaway to get you kickstarted in your marbling obsession. Leave a comment below and I’ll randomly select a winner to receive this goody package: a copy of the current Martha Stewart Living issue, one 12 pack of Martha Stewart Crafts acrylic paint (kind of like this) and one 8 oz bottle of Martha Stewart Crafts Durable decoupage (U.S. and Canada only). Gee. I’m kinda wishing I could win this! Make sure you leave your email or other way for me to find you if it’s not connected to your profile.

This giveaway is now closed. Congratulations, B. Kolic! You are the lucky winner! I’ll be in touch soon.

Ryan Liebe for Martha Stewart Living

I haven’t tried marbling yet, but I certainly want to now! I think it would be a great way to get some gorgeous wall art. Or, how much fun for an Easter table runner. Oh, the possibilities are endless!

Of course, you can find this craft and lots of other great ideas in the March issue of Martha Stewart Living, available on newsstands and for iPad now. This issue is gorgeous. I mean, just look at the cover!

Tutorial for Marbling
This tutorial is provided courtesy of Martha Stewart Living and can also be found at Martha Stewart.
Materials

  • Alum
  • 2 shallow plastic bins (with lids, optional)
  • Medium (paper, leather, or fabric)
  • Plastic bucket
  • Methocel
  • Distilled water
  • Clear ammonia
  • Whisk
  • Craft paints
  • Paper cups
  • Dispersant
  • Coffee stirrers
  • Clothesline or drying rack
  • Paper towels

Step 1

Prepare Materials: Mix 3 tablespoons alum per quart of hot tap water in a bin; let cool. Soak leather or prewashed fabric in mixture for 20 minutes, or brush onto paper. Let dry flat. (Reserve alum mixture in bin to use over several days.)

Step 2

Prepare “size,” or base, for paint: In bucket, mix 4 tablespoons Methocel per gallon of warm distilled water. Add 1 tablespoon ammonia per gallon and mix vigorously with whisk.

Step 3

Pour Methocel mixture into second bin. Let sit until all bubbles dissipate. (This should take several hours; mixture will have a sheer, viscous consistency, slightly thinner than egg whites.)

Step 4

Squeeze paints into paper cups (mix some, if desired). Thin each with a drop of dispersant and slowly add water until paint has consistency of whole milk.

Step 5

marble-process-0541-md110796.jpg
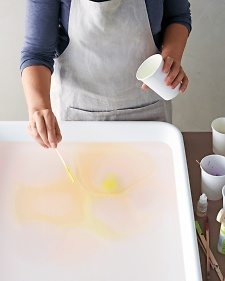
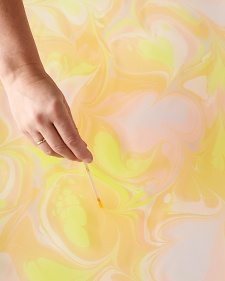
Marble: With a coffee stirrer, drop paint onto several spots on surface of size; let pigment spread out 2 to 3 inches.

Step 6

marble-process-0572-md110796.jpg
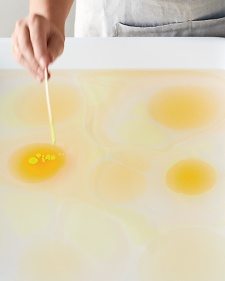
Add another color, dropping paint into middle of previous color, if desired.

Step 7

marble-process-0641-md110796.jpg
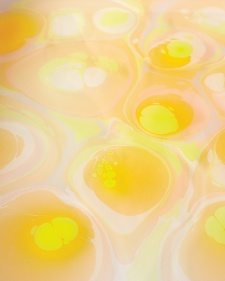
Continue in this fashion, adding color over color and letting paint spread out and form random shapes. Repeat sequence in several spots over surface.

Step 8

marble-process-0666-md110796.jpg
Some paints will spread out more than others; the more concentrated the color, the more it will stay put.

Step 9

marble-process-0727-md110796.jpg
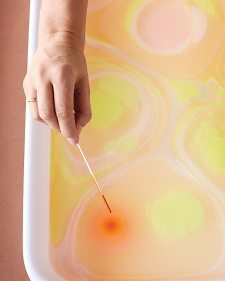
Drag stirrer through paint to add swirls and create designs; work over whole bin, or focus on specific areas.

Step 10

marble-process-0791-md110796.jpg
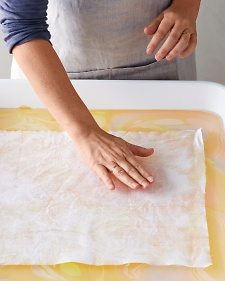
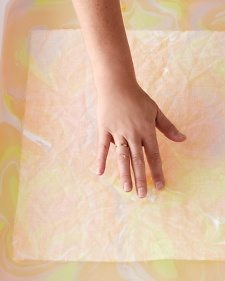
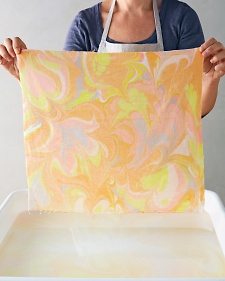
Gently lay medium flat onto size, and pat to remove air bubbles.

Step 11

marble-process-0805-md110796.jpg
Let sit until fully saturated.

Step 12

marble-process-0810-md110796.jpg
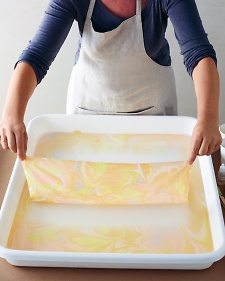
Pick medium up by two corners.

Step 13

marble-process-0847-md110796.jpg
Gently and evenly pull up. Rinse thoroughly under running water until soapy film is gone. Hang to dry. Lay paper towels on size surface, then lift to remove paint. Reuse size as desired for several days (cover bin with lid or plastic wrap when not in use to protect from dust).

Good luck! Make sure you tell me if you try it!

Leave a comment

This site is protected by reCAPTCHA and the Google Privacy Policy and Terms of Service apply.

All comments are moderated before being published.

Read more

Arm Knitting How To Photo Tutorial // Part 4: Finishing with Mattress Stitch
arm knit

Arm Knitting How To Photo Tutorial // Part 4: Finishing with Mattress Stitch

This is it! You’re so close to being done. Just a few loose ends to tie up and your basic arm knitting skills will be complete! You’ve reached Part 4: Finishing Arm Knitting of a 4 part arm knitti...

Read more
Friday Flowers: Grocery Store Arrangement, Roses
arrangement

Friday Flowers: Grocery Store Arrangement, Roses

There have been such gorgeous flowers at the grocery store lately. I love to buy three or four small $4 bouquets and turn them into something beautiful. I know flowers don’t do it for some fol...

Read more