Skip to content

Cart

Your cart is empty

Sign up for our newsletter

GET 10% OFF FOR SIGNING UP! Receive updates on new kits, sales, freebies, helpful info + more.

Blog

arm knit

Arm Knitting How To Photo Tutorial // Part 4: Finishing with Mattress Stitch


This is it! You’re so close to being done. Just a few loose ends to tie up and your basic arm knitting skills will be complete!
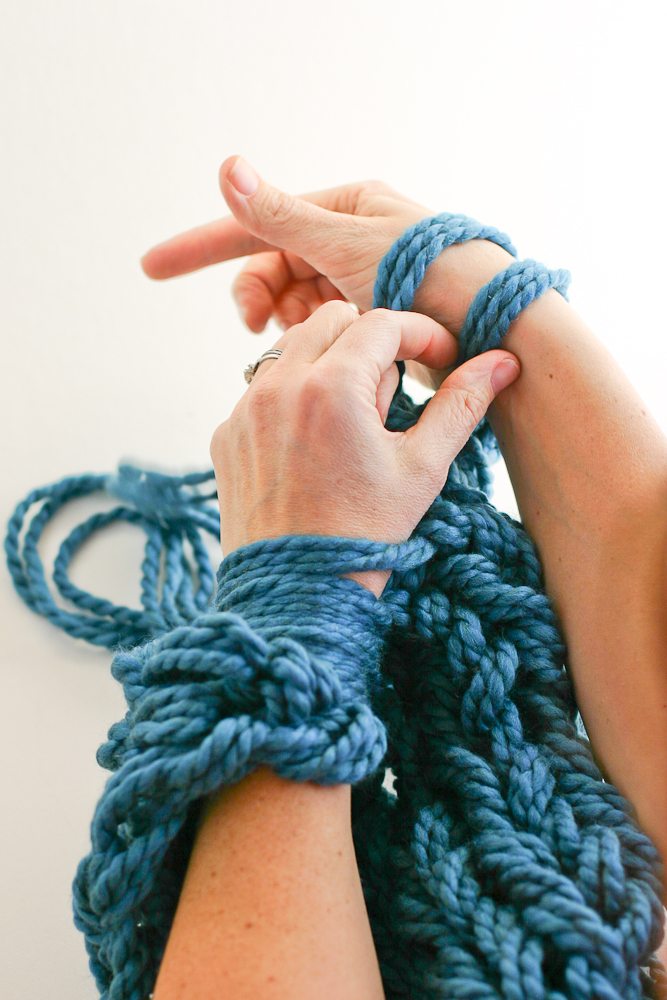
You’ve reached Part 4: Finishing Arm Knitting of a 4 part arm knitting tutorial. If you’re looking for another part, you will find it here:
If you want to have a portable copy, you can purchase the instant download PDF of complete instructions here. If you’re interested in a pre-made kit with thick luxurious yarn for your cowl, there are some in my shop.
To finish the cowl, or to join any two ends of arm knitting together, use the mattress stitch. When you seam with a mattress stitch, it puts the seam on the backside or wrong side of the knit fabric and makes the front side look magically joined.

Mattress stitch:

// Start the mattress stitch by placing the two ends of arm knitting abutted up against one another with the right sides or knit sides facing up. Your working yarn should come from the top. The ends should match in width. You may have to pull the cast on edge wider a bit to match up evenly. The stitches should give a little to allow this. Take care not to pull too far, though.
// Bring your working yarn underneath the first line of stitches on the right side (see the “v”?). Pull it all the way through.
// Bring the yarn over to the left side and bring the yarn under the first line of stitches on that side. Pull it all the way through.
// Repeat on the right.
// Repeat on the left. Continue until you’ve seamed the length of your work. Leave the stitches you’re making loose enough so that the yarn you’ve run through looks like a line of stitches itself.


Weaving in the ends:

// Flip the work over to the purl side to weave in the end of the working yarn on the wrong side of the piece.
// Weave the yarn under and over loops of the tighter side of the seam (the cast on edge).
// Tuck the yarn under multiple stitches in the seam and cut.

// Go to the other side of the work to weave in the tail.
// Weave in the tail in the same manner you did the working yarn. Cut end.

This cowl was made with Loops and Threads Cozy Wool.

YAY! Good job! You’re off to go arm knit to your heart’s content. I hope it’s been simple enough and that you’ve enjoyed the process. If you’ve liked this tutorial, share it with your friends! I’ve been developing all sorts of amazing patterns and things to make with your new arm knitting skills, most of which will be included in my upcoming book, to be published by Potter Craft in Fall 2015. I wish book publishing were as fast as blog publishing! Until then, go strut your stuff in your new cowl!
This cowl was made using Lion Brand Wool Ease Thick and Quick.

Leave a comment

This site is protected by reCAPTCHA and the Google Privacy Policy and Terms of Service apply.

All comments are moderated before being published.

Read more

Arm Knitting How-To Photo Tutorial // Part 3: Binding Off
binding off

Arm Knitting How-To Photo Tutorial // Part 3: Binding Off

Okay, we’re so close now! It’s time to bind off that lovely arm knit fabric from your arm. It’s okay, you can be a teeny, tiny bit relieved (joyous!) that you are done and it’s coming off. It’s so...

Read more
Easy Marbling Tutorial + Martha Stewart Living Giveaway
DIY

Easy Marbling Tutorial + Martha Stewart Living Giveaway

Ryan Liebe for Martha Stewart Living It’s that time of the month! I’m so excited to be able to share this gorgeous marbling tutorial from Martha Stewart Living. Marbling is one of those ...

Read more