


Finger-Knit Wreath–a Five Fabulous Finger-Knitting Project


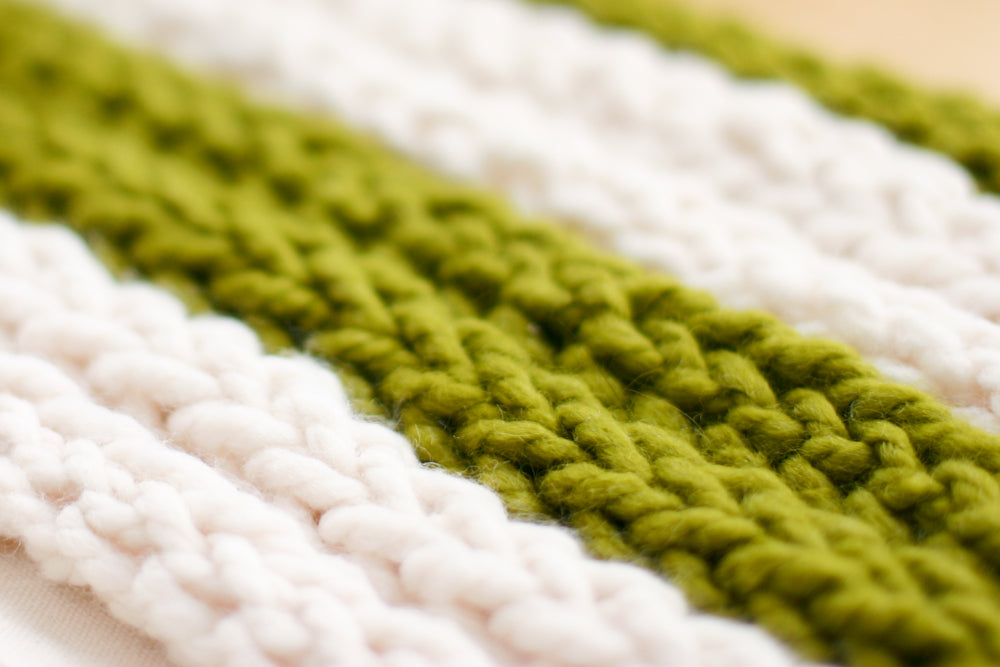
I love neutral wreaths with just a touch of holiday color. I adore that rich green against the cream, but the metallic taupe dupioni silk ribbon is so lovely, as well.

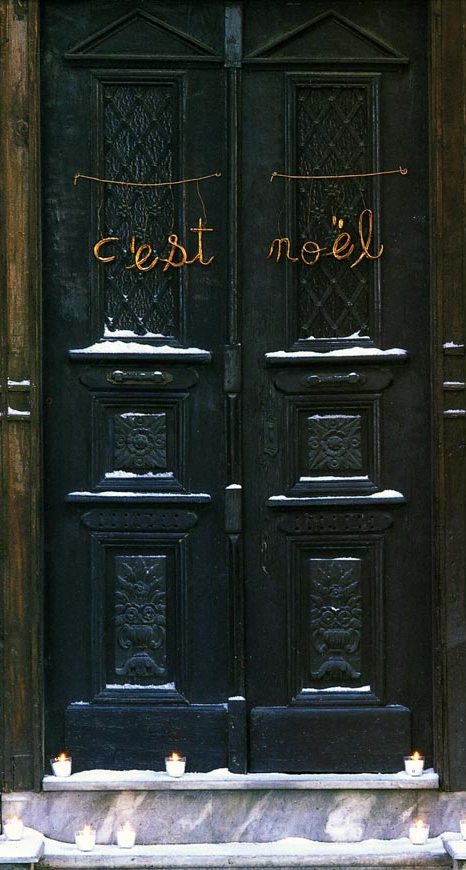
Those double doors you see are my new front doors–very dramatic and fantastic until you have to squeeze in and out that little half door with eight bags of groceries! But, I love them, regardless.

This wreath is a perfect way to wrap up my Five Fabulous Finger-Knitting Project Series! Don’t fret though, it’s not the last time you’ll see a finger-knitting project from me. To see all the projects, click on the button below.

I know it’s late in the season for wreaths, Christmas is in four days, but you really couldn’t think of a better way to keep your kiddos hands busy and happy during this long break than finger knitting.

Also, if you make the wreath neutral, you can change ribbons and embellishments with the seasons. This would look great with fall leaves, Easter pastels, spring flowers, etc. It’s as easy as weaving something new in to the yarn and styrofoam.
Here it is!


You need to begin by finger knitting your yarn. Here is a step-by-step finger-knitting how-to. Kids are great at it and it is a fun project for them to do while listening to a book read out loud. Read A Christmas Carol by Charles Dickens while you do it and your family will remember it for years to come. You will likely have to do more than one ball of yarn, but I show you how to join them below.
Next, you need to thread the floral wire through your strand of finger-knitting. This is much faster than it sounds so don’t let it stop you. Make a loop and twist in the wire so it is easier to thread without getting caught on the yarn.

Thread the floral wire through the strand by going underneath one strand per row. Don’t cut the wire yet.


Begin by wrapping a length of wire around the forms. wrapping in the strand from the end of your finger-knitting. The paddle with the wire should be at the other end.

Start wrapping the strands around the form, pulling the strand tautly, but not too tightly on the wire. In the beginning this is a little more challenging because you have to pull the entire mess through the middle. I tried making a ball of it and pulling it through, but it just ended up twisting the strand too much. It won’t take long before it’s more manageable.


It should look like this.

Once you get to the end of your strand, cut the wire, leaving about 8 inches extra wire.

To join two strands, thread the wire from the end of the strand around your wreath into your new, already-wired-strand.

Thread the wire about six to eight inches in and twist the end around the wire that is already there. Repeat this process with the wire from the new strand into the old strand.

Then, thread the yarn ends of the finger knitting chain through the strand in the same way.

Pull tightly together and continue wrapping.

When you get back to the beginning, and you still have wired finger knitting left, hold it about where it would turn around the inside of the wreath.


Twist and weave the end through the back of your wreath.

I did it such that there was a bit of hanging thread left, that I wove to come out the top of the wreath–perfect for hanging.

Voila! You’re done.

I especially love it with that long green ribbon with long tails. I only had one length of that ribbon, and I wanted to hang them on the doors, so I had to cut it in half :(. But, please, adorn it with a beautiful long-tailed bow!

Or, try a bunch of red berries.

Alright, alright, it’s time for me to get back to my other holiday duties. My family is coming in to town, including my mother, sister, brother and my sister-in-law. It’s going to be a crew! but I’m looking forward to it. Merry Christmas and Happy Holidays to all of you! I’ll see you on the flip side with a fun New Year’s Eve jewelry tute!
Leave a comment
This site is protected by hCaptcha and the hCaptcha Privacy Policy and Terms of Service apply.