Skip to content

Cart

Your cart is empty

Sign up for our newsletter

GET 10% OFF FOR SIGNING UP! Receive updates on new kits, sales, freebies, helpful info + more.

Blog

advent

Day 17: Pearl Combs - a diy hair accessory

I first made these combs with rhinestone trim. They are beautiful, you can see photos below, but it is amazing how difficult it is to photograph rhinestones well enough to catch the twinkle. I thought I’d try the pearls for the tutorial and I love how they turned out. Navy and white – so pretty together, so classic. I tried wrapping with white embroidery floss too, which also looked very pretty. In the end, I loved how the pearls stand out against the navy here, beautiful.
Here are the combs with the rhinestones and lavender. They really are quite stunning. These are done the same exact way as the pearl combs – just look below for the diy instructions!
You can use this technique with pretty much any trim on a comb, the only trick is that the spacing on the trim needs to be pretty similar to the spacing on the comb teeth. This seemed to work out fine for most of the trim I had on hand.
Looking for more exciting easy-to-make jewelry inspiration? Check out the gallery for 24 Days of Glam by clicking on the photo below.
Materials:
Combs (inexpensive drug store variety)
Trim (rhinestones, pearl string, crystal string, etc)
IMPORTANT: Trim/bead spacing must approximately match comb teeth spacing
Time:
10 minutes

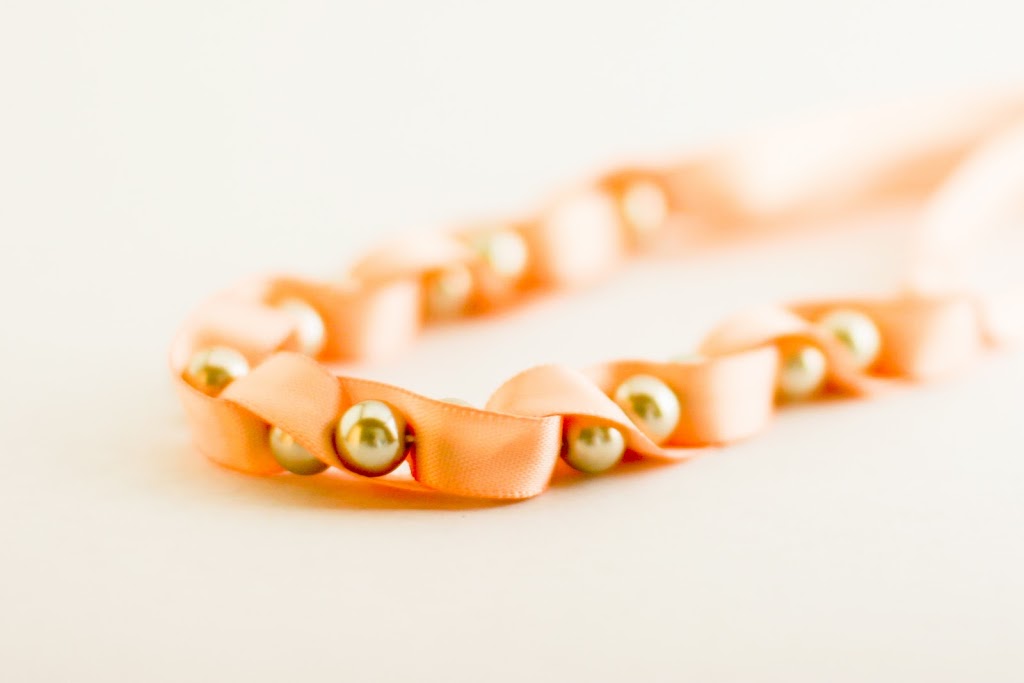
Cut your desired trim to match the comb length.

Wrap the floss three times in between the comb teeth and between the beads on the trim such that you catch the tail of your floss underneath the wraps.

Catch that tail as you wrap in between the next few comb teeth, as well. This photo doesn’t quite show it, but as I move to the next tooth and bead I will catch that tail underneath my wraps as I go.

Continue to wrap three times in between each comb tooth, going between each bead on the piece of trim. Cross over to the next tooth in the back of the comb so the front wraps are all straight. Do your wraps consistently (e.g. pick a way you’re going to do it and stick with it).

When you get to the end of the comb, turn it around and come back wrapping two times in between each comb tooth and bead.

When you get back to the beginning, finish off the end by pulling it underneath a few of the wraps. You can use a needle for this if desired. Or, you can glue it if you want it super-secure.

Finis!
Oh, yes, I like both of these very much.

Still lots of jewelry goodness to come. I actually designed a couple of new pieces (wild roar of the crowd!), because I wanted to make sure there were still some new and interesting pieces coming up. Yes, I have found this posting a tutorial every day and thinking about girls’ jewelry all the time has made me slightly certifiable – but in a good way!

We’re now on vacation in Utah, so its pretty much gonna be what its gonna be. I took all the photos before I left so I’m keeping my fingers crossed that I got everything well. See ya tomorrow.

Leave a comment

This site is protected by reCAPTCHA and the Google Privacy Policy and Terms of Service apply.

All comments are moderated before being published.

Read more

Day 16: Twisted Pearls - a diy pearl necklace
8mm pearls

Day 16: Twisted Pearls - a diy pearl necklace

I am a lover of peach. Peach and champagne – even better. I love this necklace and it really is quite simple and easy to do. I know that since I put my original post up for 24 Days of Girly Gl...

Read more
Day 18: A Bow Ring - a diy jewelry tutorial
advent gifts

Day 18: A Bow Ring - a diy jewelry tutorial

A has been begging me for another ring, and I’m glad I had one planned! Every day when she comes downstairs, she starts jumping up and down – where’s my advent? where’s my advent? What did you m...

Read more