Day 11: Chunky Pearls - a diy pearl necklace

Oh, I’m in love with this one. I adore this string of pearls. I want to make one of these for myself with a cream ribbon and the champagne pearls and make it double long so I can wrap it twice around my head.

I found only one small problem. When I went to recreate the necklace for the tutorial, I could not get the needle and ribbon through the new set of pearls I had purchased. Ack! When I made it the first time, I did have to use pliers to pull the bulk of the needle and ribbon through the hole. Maybe the hole was smaller in the set of pearls I had purchased, or maybe the I didn’t try the exact perfect needle (I tried many!) but work as I might, I couldn’t recreate the necklace! I was thinking about redoing it with a 1/8" ribbon but I didn’t think it would have the same effect.
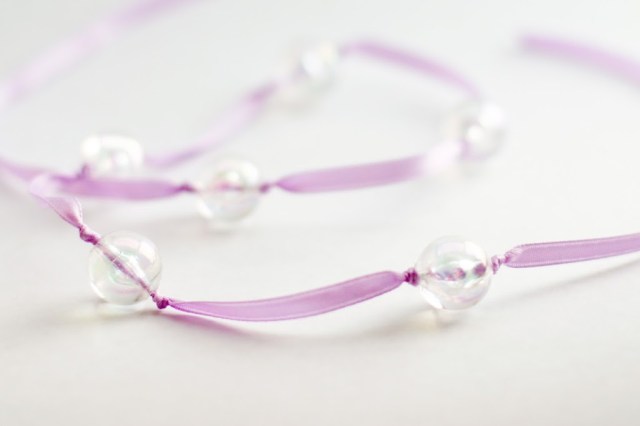
BUT, it turned out to be a good thing – sometimes these hurdles do that for you. I love the other necklace I made. Same technique–much more girly! I found these plastic iridescent crystal beads at Joann’s. They were less expensive than the pearls by a good bit. I actually think Allie will find the purple and crystal one even more fabulous.

So warning, if you buy the pearls, make sure you check the hole size. If you have some amazing technique to get the ribbon through, let me know. I was thinking about wetting it down to see if that would help, but I’ll leave that for another day. For now, I’m going to enjoy another beautiful necklace.
The trick with getting the knots tight to the beads is to hold the ribbon coming out of the bead taut out of the hole. Then wiggle the rest of the ribbon around it, keeping the ribbon taut.
One bead done – can you tell how fast this is going to be?
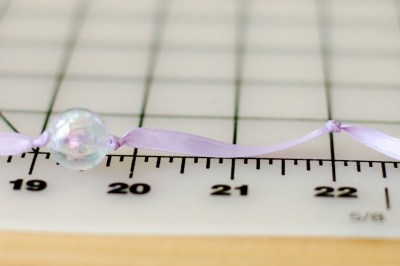
Now, tie a knot two inches later in the ribbon.
Then, string on the next bead and tie a knot on the other side and keep going until you have approximately 9" left in your ribbon.
Finis!
Yep! I think this will be one of her favorites. Tomorrow will be a very bling-y, yet sophisticated, simple bracelet. No rhinestones, but a jewel nonetheless. You’ll want to see it!


Leave a comment
This site is protected by reCAPTCHA and the Google Privacy Policy and Terms of Service apply.