


Knit Cable Bomber Sweater With Pockets

A knit cabled bomber sweater sounds super cozy, doesn’t it? Bomber jackets are winter wardrobe staple this year and the Cable Bomber sweater from Wool and the Gang is right on trend! Use the code ANNE15 for 15% off. This bulky cabled cardigan was inspired by the stylish bomber jackets that you’re seeing everywhere right now.

Everything you need to make the Cable Bomber sweater is included in the kit from Wool and the Gang. All you need is the time to sit down and make the sweater – and you won’t need much time. It’s knit with super chunky yarn and large needles so it knits up really quickly! If you haven’t knit cables before, you’ll learn that they aren’t that hard. I love the unique cable detail in this sweater.

Warning, you cannot buy the pattern alone – you can only buy the pattern with the yarn. This is part of Wool and the Gang’s store policy. I don’t mind the policy so much, as it means you get to have the sweater in their yarn, which is so soft and cozy and comes in many beautiful colors. I chose Bronzed Olive and I’m so happy I did. This color is gorgeous and unique. Don’t forget, you can use the code ANNE15 for 15% off of your purchase at Wool and the Gang.
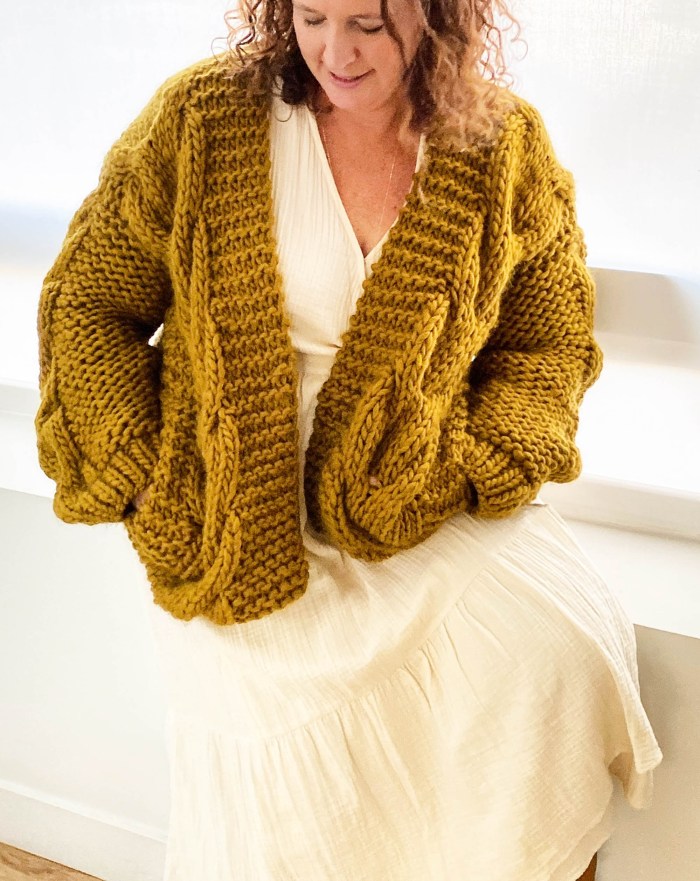
I did make some alterations to the pattern that I want to share with you. I added an extra cable to the body so it would be a little longer. ALSO, I added pockets, which I love love love! These alterations mean I am going to wear this sweater all of the time.

Add Pockets to your Knit Cable Bomber
These adjustments are for size 4, but just substitute your size and number of knit stitches as needed where I’ve added the asterisk.
Follow the Cable Bomber pattern as written until you’re just about to do your first cable (this is the row when you use your cable needle). Next, you’re going to split the sweater into the front right side, the back and the front left side. We’ll knit with them separately for 16 rows. This how where going to insert pockets. After we’ve added the stitches for the pocket, we’ll knit all the pieces together again and work the pattern as written.
1st Cable Row, Front Right Side:
Row 1: Knit 7* sts, follow cable instructions, knit 3* sts. Cast on 3 sts (these sts make the pocket flap) Turn work.
Note: I didn’t split it exactly evenly front/back as I want my pockets forward a bit. So if you do your math, 4* sts of the front side (about half of the 7* sts before the cable panel) I leave with the back section. Notice, the stitch count of your garter stitch section after the cable may be different than the count of the garter stitch section before the cable starts.
Work this set of sts only, following the cable pattern plus your extra 3 sts for 15 more rows. For the last row, bind off 3 stitches and follow pattern to the end of the row. Place the remaining stitches from the right front side on to a holder.
Back:
Place remaining stitches from back on to holder.
1st Cable Row, Front Left Side:
Row 1: Cast on 3 stitches (these sts are the left pocket flap) Rejoin yarn to left front side. Work front left side for 16 rows total, following cable instructions, adjusting for knit stitches you moved to the back and the flap sts you added. Turn work and bind off the added 3 sts.
Rejoin Sides and Back:
Cut yarn from Left Front Side and add the stitches from the Back and the Right Front Side back on to the left hand needle. Beginning at the Right Front Side, knit across all parts:
Finishing:

Leave a comment
This site is protected by reCAPTCHA and the Google Privacy Policy and Terms of Service apply.