


Embroidered Monogram Tote Bag DIY

This embroidered monogram tote bag DIY is just the thing you need to create a beautiful handmade gift. Transform a humble cotton bag into your new favorite tote with a fresh and modern hand-stitched monogram. Clean design and a typewriter font bring this simple initial in a contemporary direction using French knots and the satin stitch.

This tote was actually intended to be a holiday post, but you know, best laid plans. I did manage to give it to my sister-in-law for Christmas. Hopefully, she’s loving it. Keep a few extra bags on hand to have a beautiful, personalized gift you can make in a jiffy and gift for any occasion.
Embroidered Monogram Tote Bag DIY

Materials

1 skein Valdani Size 8 embroidery thread in (Color A)
1 skein 6-stranded embroidery thread in cream (Color B)
Plain Tote Bag (Available in stores at Old Navy)
Embroidery needle
Scissors
Air-soluble marking pen
Martha Stewart Crafts Alphabet Stencil

Next, place the top of the tote in between the handles in an embroidery hoop. Choose a pattern or symbol to embellish your monogram on either side, and use the marking pen and stencil to transfer the design to the tote, centering in between the handles and a couple inches down from the top.
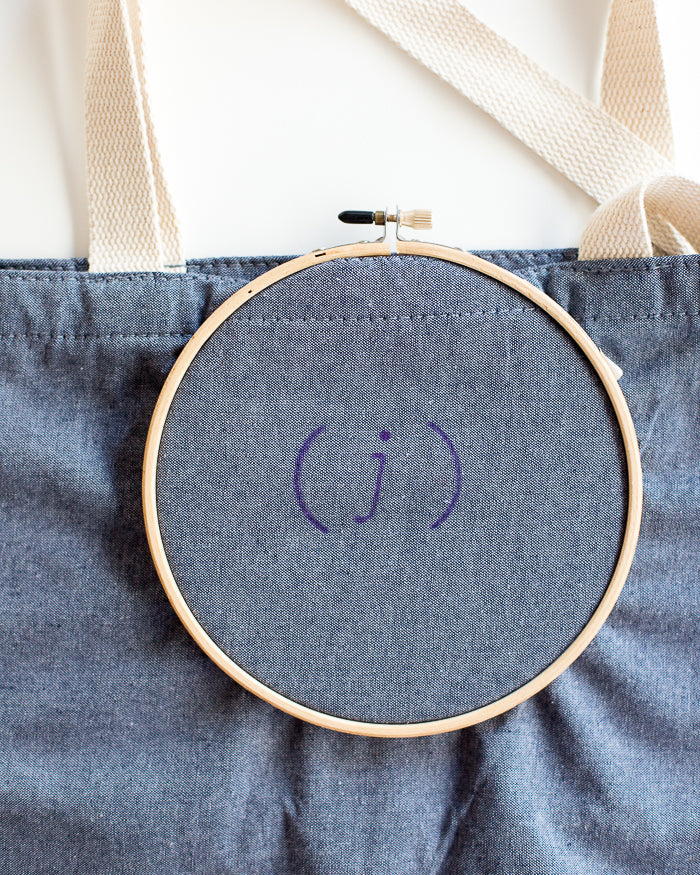
Choose monogram letter desired from stencil pack. Center stencil at top of tote bag, in between the design elements. Use an air-soluble marking pen to mark through the stencil cutout on to the bag.

Secure the Color A embroidered thread with a knot. Make French knots along the design element’s line. Make a French knot by bringing the needle from back to front. Wrap the thread around the needle twice.

Bring the needle through the tote from front to back just next to where the thread is currently coming out of the tote.

Keep the wraps close to the face of the fabric while holding the thread taut as you pull the length through to the back. After covering desired lines with knots, secure thread by bringing the needle through a small stitch made at the back of the work.

For the monogram, complete the satin stitch across the letter shape. Secure the Color B thread with a knot and beginning at the bottom of the monogram, bring the needle from back to front just to one side of the monogram line. Bring the thread across the width of the letter and go from front to back on the other side of the letter line. Continue to make parallel satin stitches across the stencil mark, covering the initial with your stitches as you go.

Finally, to emphasize the initial, go over the stitches a second time. Secure thread to the back of work as above, and remove the hoop. Now, gift your embroidered monogram tote bag DIY to your favorite friend!

This embroidered monogram tote bag DIY was originally shared over at Martha Stewart. Head over there to check out my profile for other projects contributed to Martha Stewart. For more of my embroidery projects, check out the embroidery archives!

Leave a comment
This site is protected by reCAPTCHA and the Google Privacy Policy and Terms of Service apply.