Skip to content

Cart

Your cart is empty

Sign up for our newsletter

GET 10% OFF FOR SIGNING UP! Receive updates on new kits, sales, freebies, helpful info + more.

Blog

DIY

DIY Gold Ring Necklace - a year of handmade gift

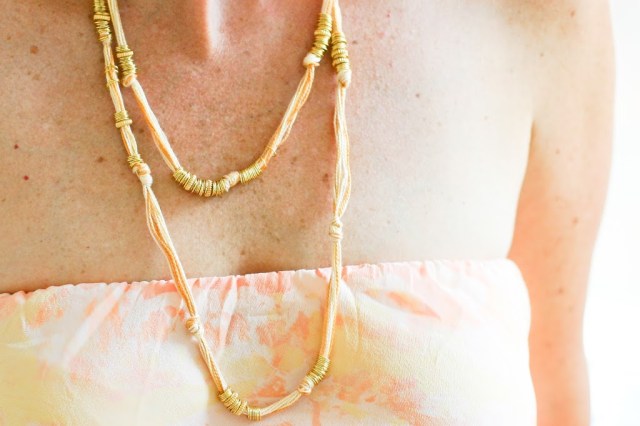
I recently went to Miami Beach – woo hoo! to celebrate my 40th birthday (which isn’t until September, by the by) with nine of my wonderful, smart, talented and beautiful college girlfriends. We had a blast! What is it about the friends you made when you were 18 that makes them the best of friends? I guess part of it is that you meet them when you are just blooming as an individual. In any case, I love them like sisters. When I knew where we were going, I wanted to find a dress that said Miami! I went to the local consignment store, Common Threads, and found this beauty for $23!! I love the water color feel. I wanted a necklace that would be a spot-on match and decided to make it for myself.
I love the result. It was easy to pick custom colors that matched perfectly, and I made the necklace in about a half an hour. Wunderbar! The complete diy is below. Very simply, it is embroidery thread with jewelry jump rings strung on the strands with a few gold beads mixed in.
I thought the necklace made a great companion to my dress. I think you should custom make one for your own favorite summer dress for this season. And then, go have a stinking good time!
This necklace is part of my commitment to make only handmade gifts this year. This one just happens to be for me! For more handmade gift ideas, check out the a year of handmade gallery here or by clicking below. If your interested in more jewelry, check out my 24 days of glam gallery here.
Materials:
Six colors of DMC 5 embroidery thread (or one color if you prefer)
Jump rings in bulk (I got these from JoAnn’s in the jewelry section)
Gold beads (these are the thicker ones)

Measure 156 inches of the six colors of thread. Cut the strands in half.

Place the two lengths side by side, you should now have 12 strands together that measure 78".

Thread the 12 strands on to a darning needle.

Tie a simple knot about 6 inches in from the end.

Now, tie another knot on top of that. Do this by bringing the first knot into the middle of the second knot and tightening.
It should look like this when you are done.
Now, string a mixture of the gold beads and jump rings on to the embroidery thread, bring the beads to the knot you just made.

Move down the length of embroidery thread about 3 inches and make another double knot.

Now, string on more beads and rings. As you do each section, add the beads in a random pattern, sometimes only jump rings, sometimes with two gold ring beads, sometimes none at all.

At the end, you should have a strand that looks something like this below.

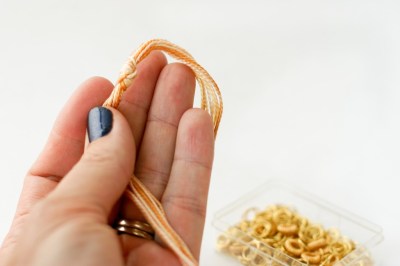
You can finish the necklace with jewelry fixings if you’re so inclined, but I always like to make it pretty quick and easy. To complete the top, I made a slipping knot that can adjust the length of the necklace easily. Overlap the two ends. With left hand end, tie a square knot around the right hand end.

Then, tie the same knot with the with the right hand end, around the left hand end. It sounds more complicated in words – look at the photos.

It should look like below. Trim the ends on each knot. You can shorten and lengthen the necklace by pulling the knots further away from each other or bringing them close to one another. In this manner, you can also wear the necklace as a bracelet and pull the knots apart while it is on your wrist to tighten the bracelet.

This photo is blurry, but I included it so you can see what it looks like when the knots are kissing and the ends are trimmed.

FINIS!! You can wear it doubled, or straight or around your wrist, too!

Happy making! Here’s a snap shot from my Miami trip of my lovely friends, whom I adore. If I don’t post for a while, send someone looking for me, as one of my friends may kill me for posting a photo of them in their swimsuits.
xo anne

Leave a comment

This site is protected by reCAPTCHA and the Google Privacy Policy and Terms of Service apply.

All comments are moderated before being published.

Read more

Kiwi Crate Winner and Kicking Off Summer . . .
life & design

Kiwi Crate Winner and Kicking Off Summer . . .

Congratulations to Nikki T. You’ve won the kiwi crate – Colors. I’m so excited for you. It looks absolutely fabulous. You didn’t leave your email, so please contact me at flaxandtwine (at) gmai...

Read more
Pretty As A Picture: Nautilus
beach

Pretty As A Picture: Nautilus

I’ve got beaches on the brain lately. I have really big news brewing over here that lead me right to sandy shores. I will share more when I can, but it is super SUPER exciting for my family. Rec...

Read more